E-mail configuration with Outlook Office 365
Set up your e-mail account with Outlook Office365 step by step.
If you have created an e-mail address in the Control Panel, you can set it up in Outlook Office 365.
1 E-mail Account Management
Select the 'File' tab at the top left, then 'Add Account'.
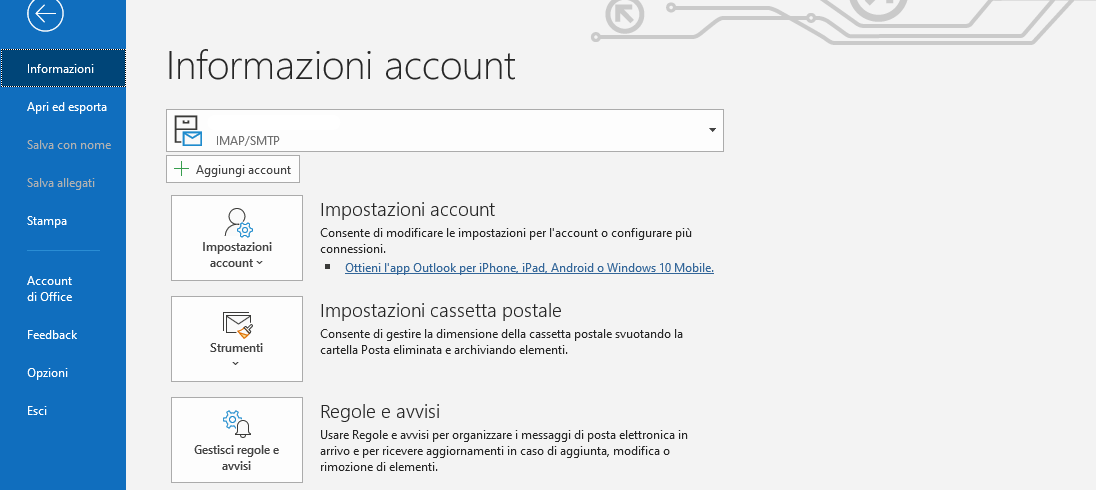
2 Automatic configuration
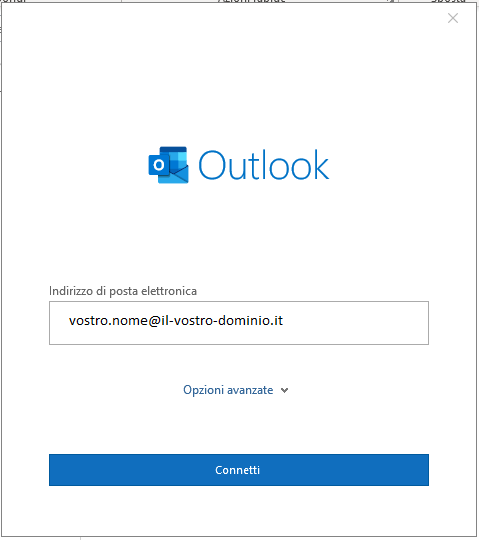
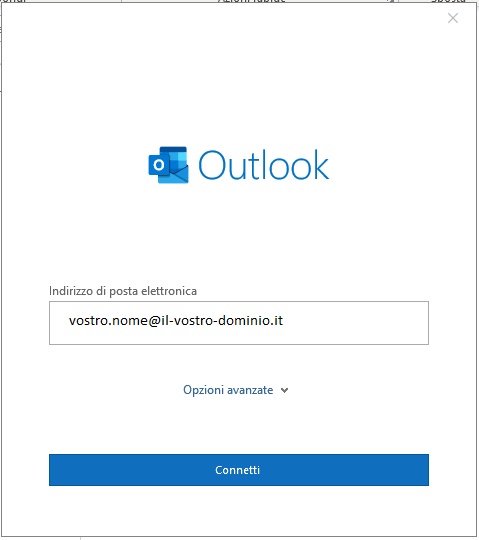
Please enter your full e-mail address.
By clicking on 'Next', the system will automatically search for the correct account settings.
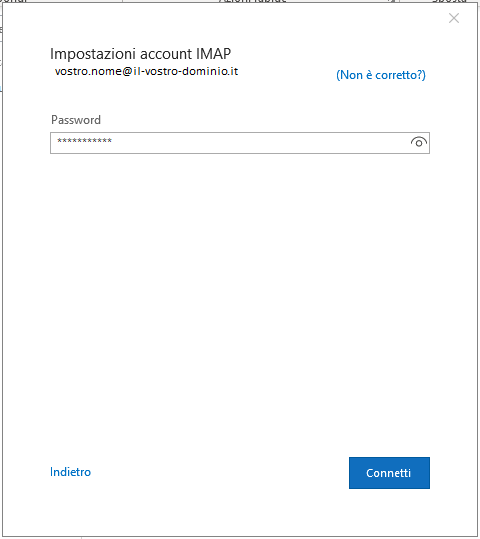
Enter in the 'Password' field the password of your e-mail address that you chose when you created it in the Control Panel.
If the confirmation page appears, it means that your account has been correctly configured.
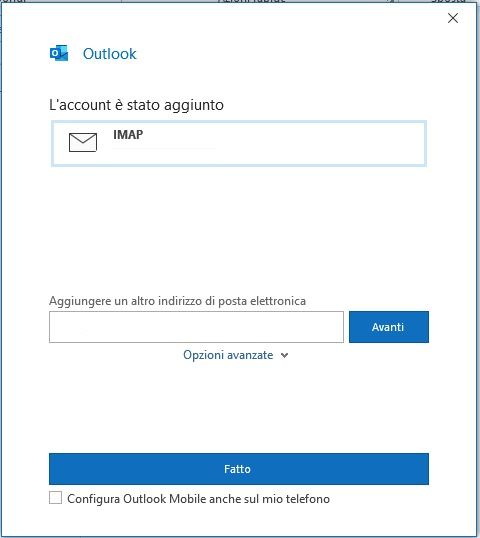
To configure the e-mail address yourself, select 'Manual configuration or additional server types', then click 'Next'.
3 Manual configuration
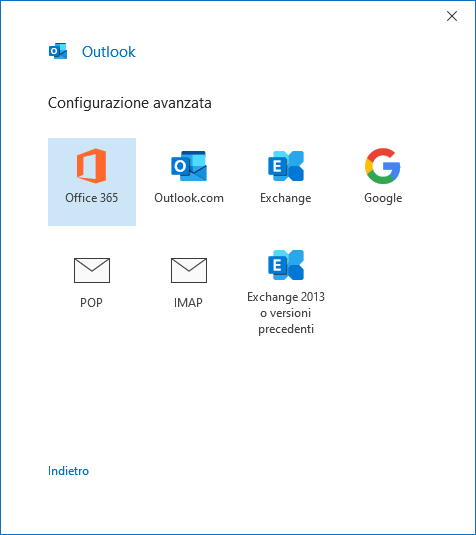
4 Account type selection: POP3 or IMAP
Now choose whether you wish to set up an POP3 o IMAP.
- IMAP
- By selecting an IMAP account, e-mails remain on the server. Each time the e-mails are read, a copy is downloaded from the server.
- POP3
- By setting up a POP3 account, e-mails are downloaded and saved on your smartphone. The messages are then deleted from the server and you can read your e-mails at any time even offline, e.g. on the train.
If in doubt, select IMAP.
Enter in the 'Password' field the password of your e-mail address that you chose when you created it in the control panel.

If the confirmation page appears, it means that your account has been correctly configured.

5 Outstanding configuration
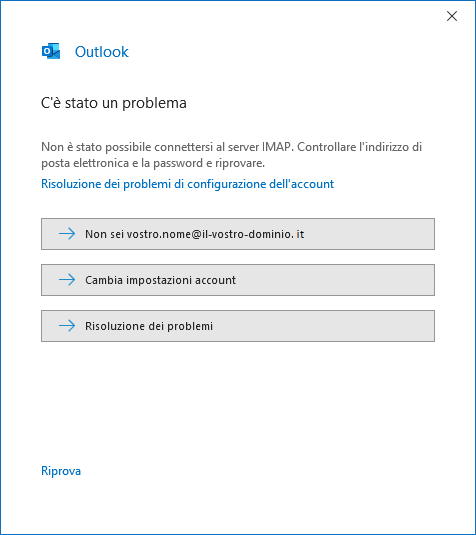
If your user name (e-mail address) or password is incorrect, you will see an error message. Select 'Check account settings' here.

Enter in the 'Password' field the password of your e-mail address that you chose when you created it in the control panel.

If your user name (e-mail address) or password is incorrect, you will see an error message. Select 'Check account settings' here.
In the field 'Incoming Mail Server' as server name enter imap.your-domain-it for IMAP or pop.your-own-domain.com for POP3.
In the 'Outgoing Mail Server' field, the server name to be entered is asmtp.your-domain.co.uk.
For both servers, select either 'STARTTLS' or 'SSL/TLS' encryption.
Check the Connection Ports using the following information:
| Account and connection type | Port |
|---|---|
| IMAP with SSL connection type | 993 |
| IMAP with TLS connection type | 143 |
| POP3 with SSL connection type | 995 |
| POP3 with TLS connection type | 110 |
| SMTP with SSL connection type | 465 |
| SMTP with TLS connection type | 587 |
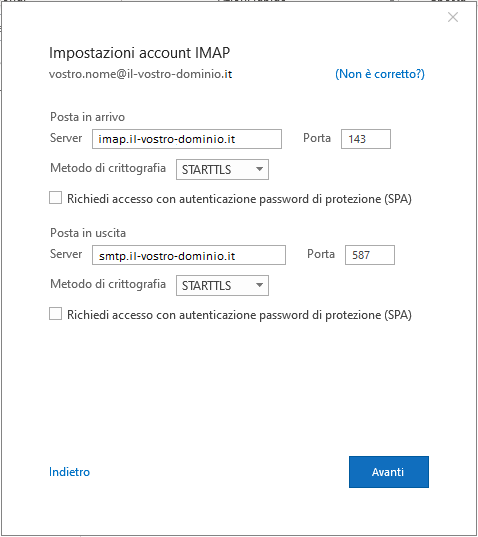
Confirm the settings by clicking 'Next'. The system will proceed to check the account settings and if they are correct, a page showing the successful configuration will be displayed.


